

Face Shape Photography Tips: Optimizing Camera Angles for Your Specific Features
AscendMax is the #1 face rating & looksmaxxing app. Join 100,000+ others on a mission to become the best version of themselves.


I used to cringe every time someone pulled out a camera. Not because I'm camera-shy, but because I knew exactly what would happen – that awkward angle that made my already prominent jawline look like I could cut glass, or the overhead shot that turned my round face into a perfect circle. After years of running photography teams and countless headshot sessions, I've learned that understanding your face shape isn't vanity – it's strategy. The right angle can be the difference between looking like yourself on your best day versus wondering who that person in the photo actually is.
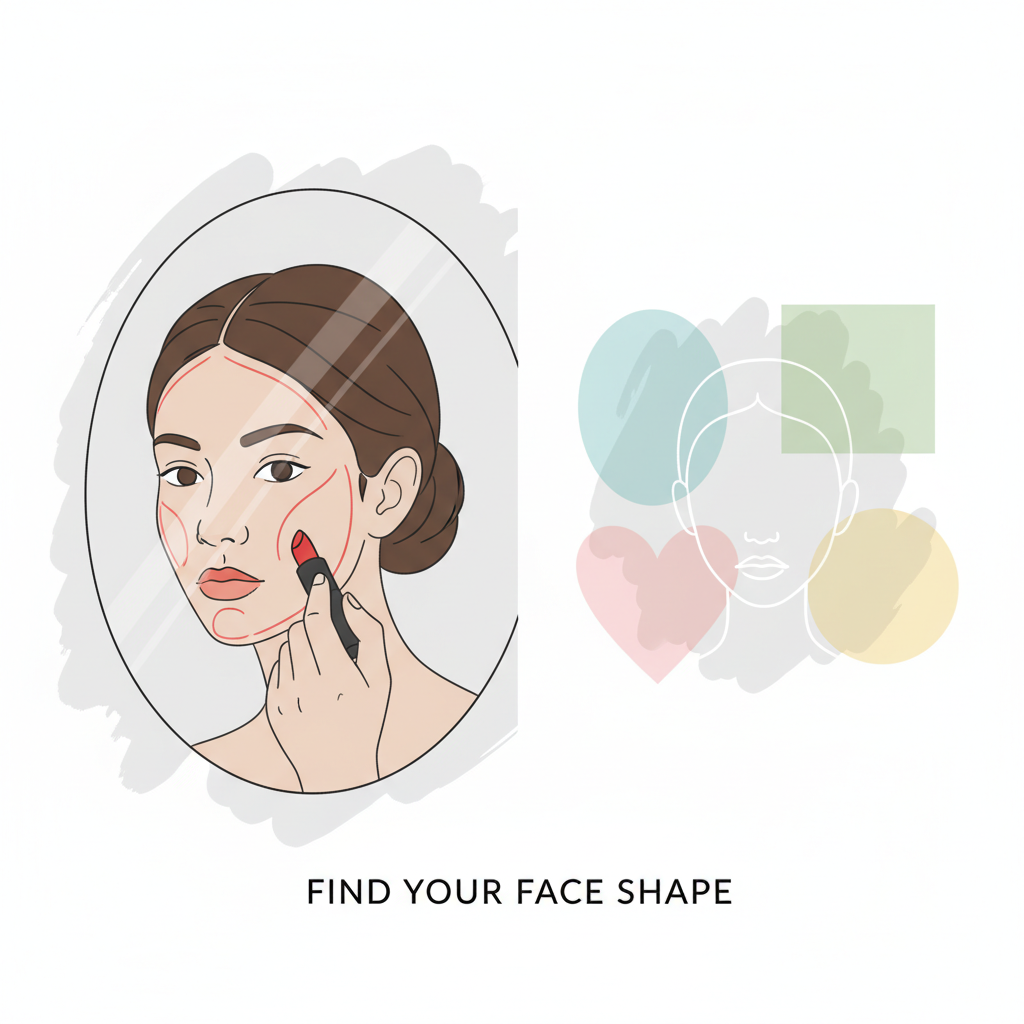
Quick Face Shape ID: Mirror Test That Actually Works
Step 1: Stand in front of a mirror with your hair completely pulled back. I'm talking slicked back with gel or a tight ponytail - you need to see your actual hairline, not guess at it.
Step 2: Trace your face outline on the mirror with washable marker or lipstick. Start at your hairline and go around your jawline back up to the other side. Don't cheat and suck in your cheeks.
Step 3: Step back and look at the shape you traced. Oval faces are longer than they are wide with a slightly narrower forehead. Round faces look like circles. Square faces have a strong jawline that's almost as wide as the forehead. Heart-shaped faces are wider at the temples and narrow to a pointed chin.
I've done this with dozens of people, and it's way more accurate than those online quizzes that ask about your "cheekbone prominence."

Camera Height Sweet Spots: Where to Position Your Lens for Each Face Shape
Option A: Eye-Level Positioning Setting your camera right at eye level works beautifully for oval and heart-shaped faces. I've found this creates the most natural perspective and keeps proportions balanced. For round faces, I actually drop the camera slightly below eye level - maybe 6 inches down - which elongates the face and reduces that fuller cheek appearance.
Option B: Above Eye-Level Shooting Positioning the camera 12-18 inches above eye level is my go-to for square and rectangular faces. This higher angle softens strong jawlines and creates a more flattering perspective. However, I avoid this with round faces because it emphasizes width.
The key insight I've learned: your face's longest dimension should never align with the camera's natural emphasis. Round faces need vertical stretch, angular faces need softening from above.
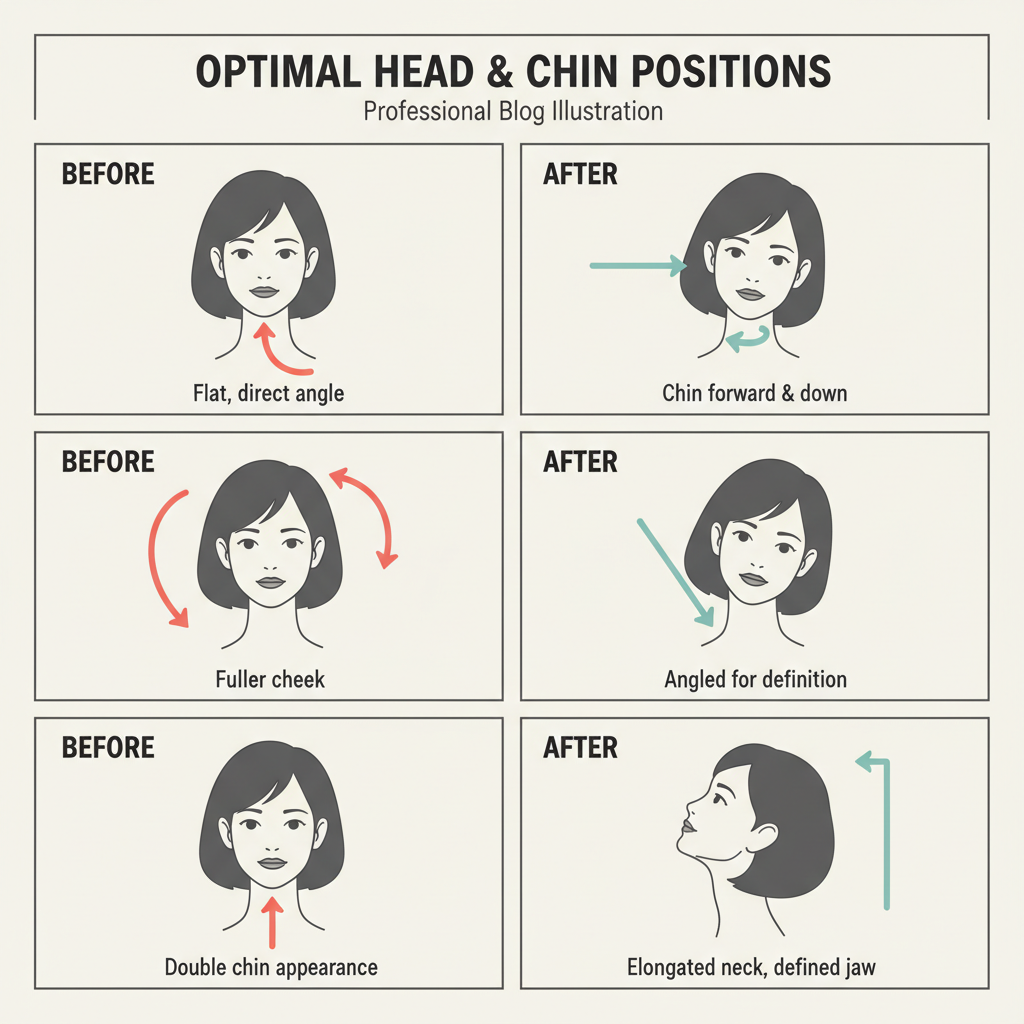
Instant Jawline Fixes: Head Positioning Tricks That Transform Your Photos
I stumbled onto the best jawline trick by accident during a terrible Zoom call in 2020. My laptop was too low, forcing me to look down at the camera – and suddenly I had a jawline that could cut glass. Turns out our grandparents knew something about portrait positioning that we forgot in the selfie era.
The magic happens when you push your head slightly forward and down, like you're trying to read something just below the camera. It sounds weird, but this "turtle" position creates shadow definition under your jaw while tightening everything up. I've watched friends go from soft, round faces to sharp, defined looks just by adjusting their chin angle.
Your camera should be at eye level or slightly above – never below unless you want that unflattering up-the-nose shot that haunted MySpace photos.
What People Ask
Does face shape photography really make that much of a difference in how you look?
Honestly, yes - I was skeptical too until I started paying attention to my camera angles. The difference between shooting from below (which makes my round face look even wider) versus slightly above eye level is dramatic enough that people comment on how much better I look in certain photos.
Is it worth learning specific camera angles for different face shapes, or is good lighting enough?
Good lighting helps, but from what I've seen, angle trumps lighting every time. I can have perfect lighting but if I'm shooting from the wrong angle for my square jawline, I'll still look unflattering - whereas a decent angle with okay lighting usually works way better than the reverse.
Do these face shape photography "rules" actually work for everyone, or is it just marketing hype?
The basic principles definitely work - like how shooting slightly above works better for round faces and straight-on or below works for longer faces - but you've got to adapt them to your specific features. I'd say about 80% of the "rules" are solid starting points, but you'll need to experiment because everyone's face is different beyond just the basic shape category.
My Go-To Move for Any Face Shape
Here's what I'd do if you only remember one thing from this: take a test shot, then move your camera up about six inches and shoot again. That slight upward angle works magic for pretty much everyone - it's like instant confidence in a frame. Trust me, you'll see the difference immediately.


